Our Montessori Functional Kitchen [IKEA Hack]
This post may contain affiliate links, which means I may earn a small commission if you buy through my link but does not change your price.
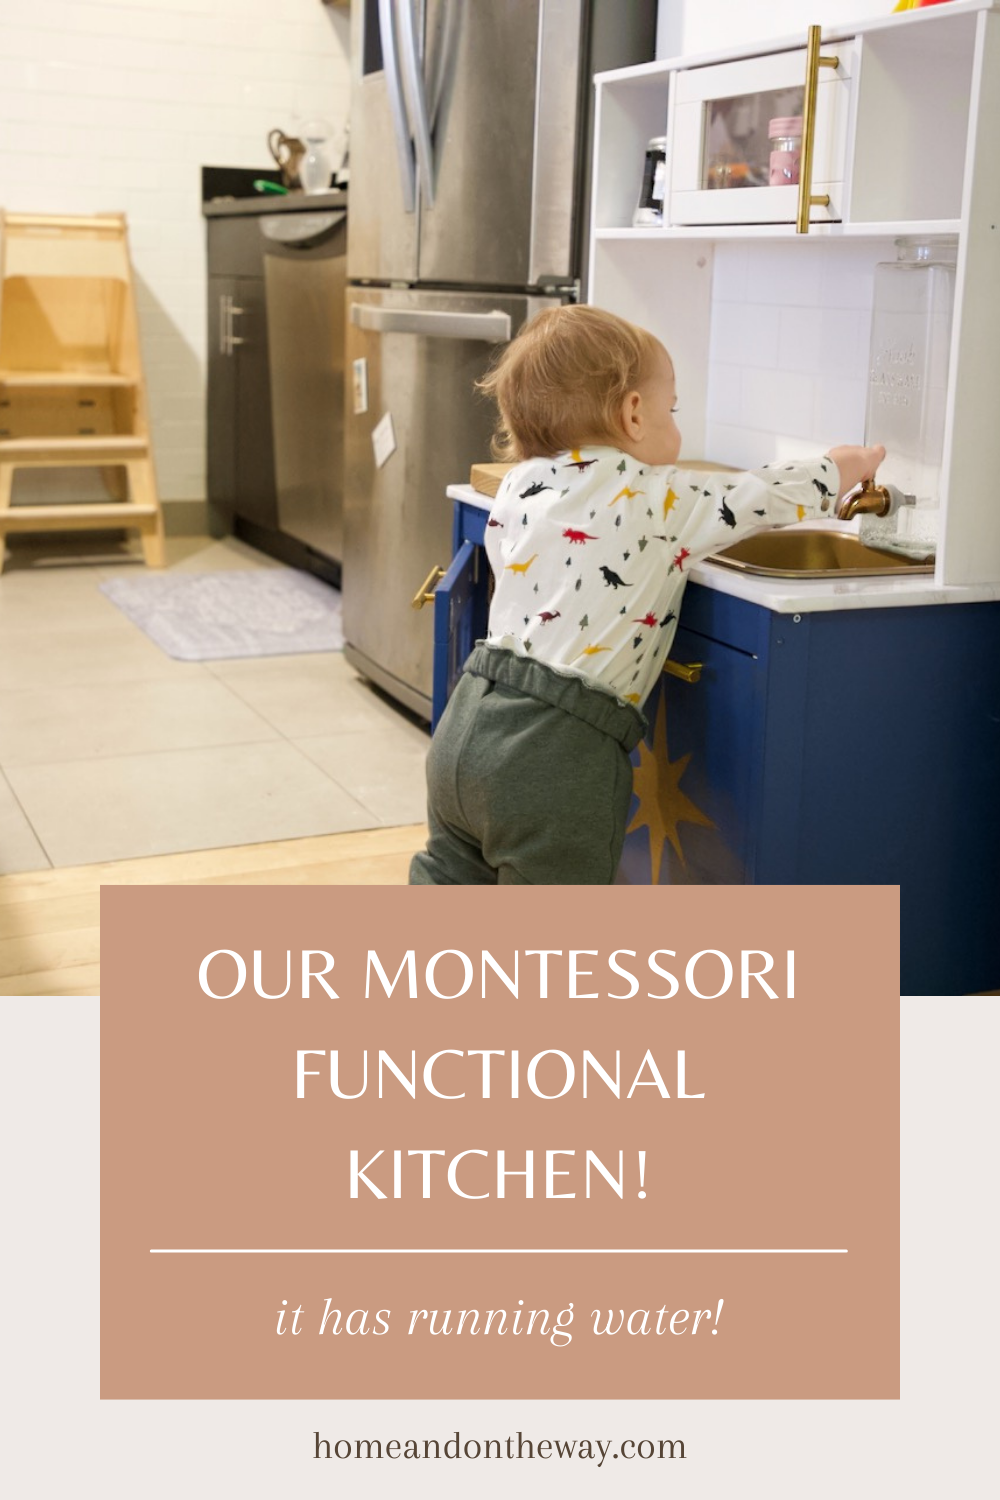
I was dreading Yitzchak’s first birthday because I was so emotional about the transition, but there was one thing I was excited about: getting his functional kitchen! This was his biggest first birthday gift from my Mom. I am not a DIY person but she is. Play kitchens are generally not as popular in Montessori, opting for functional kitchens where the child can actually prepare snacks, get their own water, etc.
Functional kitchens are definitely not a requirement in a Montessori home but for us with our limited cabinet space it was honestly easier than giving him a cabinet in our kitchen. We decided to make it fun and hack the IKEA kitchen to be the Montessori functional kitchen of my dreams. I am wanting desperately to remodel my kitchen, but that’s not on the horizon so I put all my design energy into the Montessori functional kitchen.
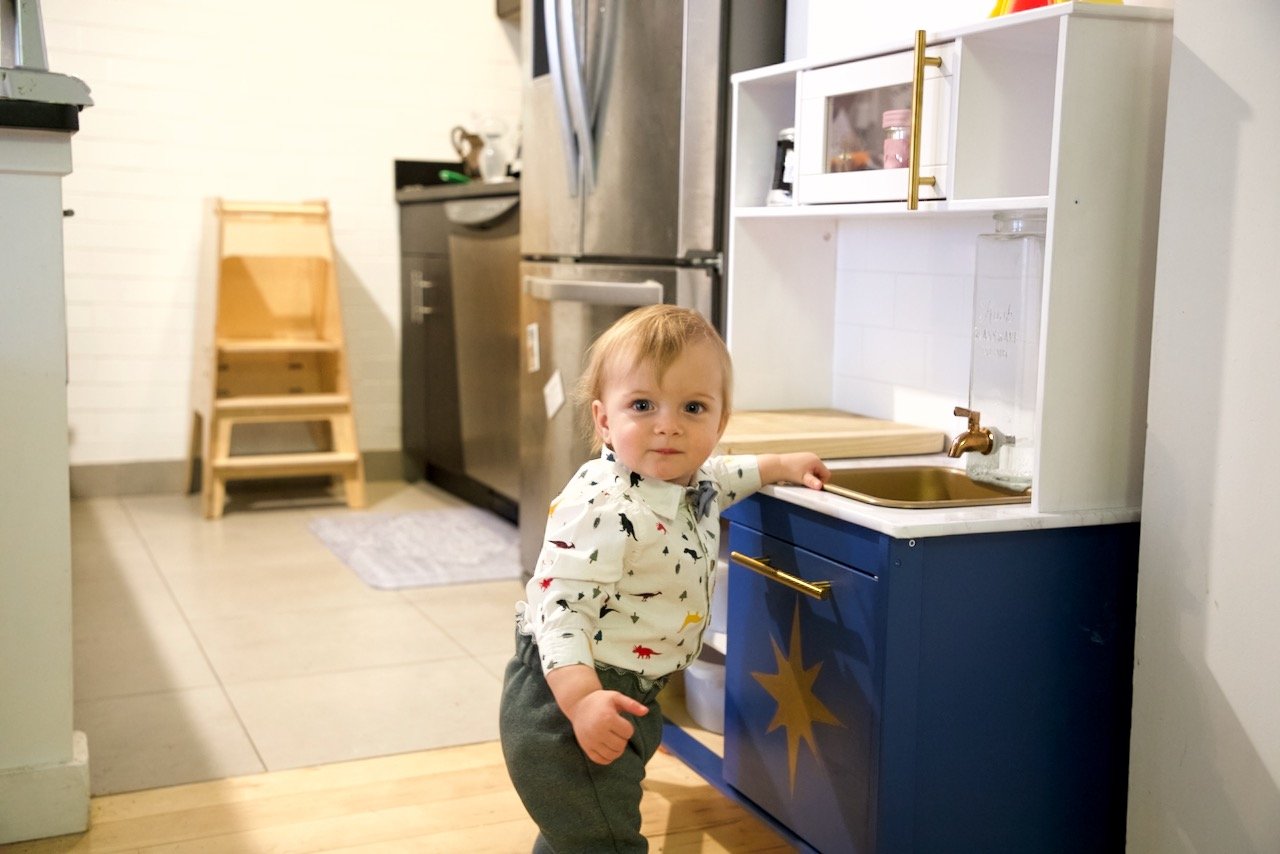
I wasn’t sure how Yitzchak would take to it since he is definitely on the youngest end of Montessori functional kitchen users at barely one. He was so excited though! When he saw it wrapped up in the kitchen he immediately went over to unwrap it. Once unwrapped he started exploring the features of his Montessori functional kitchen right away. Within a few minutes, he had figured out how to turn the water on and even filled up a cup to drink! It will definitely be a learning curve to not have water everywhere, but I don’t mind a wet floor for that enthusiasm!
We started with the IKEA play kitchen base. This is a good base to start with because it is affordable and easy to modify. I knew I wanted a dark blue kitchen with brass fixtures. Since my mom remodeled it I asked her to share the process! Here’s what she said:
“It all starts with a box. Because, after all, it is IKEA. I had it delivered to the door for an extra $20. Because everything already has a clear or white finish on it, I decided to vigorously sand all the parts with a 150 grit (medium-fine) sandpaper so the paint would stick properly. Since some of the white pieces would stay white, I set those aside. I found it easier to partially assemble parts before painting because then the units could stand on their own and I did not have to be concerned about painting over anything that would later complicate assembly.
I selected some good quality Behr paint in the two colors (Tidal Blue and White). While an oil-based paint might be preferable for a “wet” application like this Montessori functional kitchen I dislike working with oil paints because of the toxic cleanup so I carefully applied 3-4 coats of the water-based paint. To give the new kitchen a mid-century flair I replaced all the handles with sleek brass ones that I purchased on Amazon. Any 5-inch center handles will work nicely. If you want to save on that expense the plastic handles that come with the set can be spray painted.
I spray-painted the sink. Wanting to match the brass handles as well as possible, I chose a brass metallic spray paint with a clear coat spray finish to give it additional durability. The final brass accent was a hand-painted starburst on the solid door under the sink, hand-painted with brass-tone metallic craft paint.
I removed the leg extenders since Yitzchak is still small. He can access the sink in his Montessori functional kitchen fine without the leg extenders on, but it would be too tall with them on.
I painted the countertop white at first but later decided to cover it with faux marble contact paper.
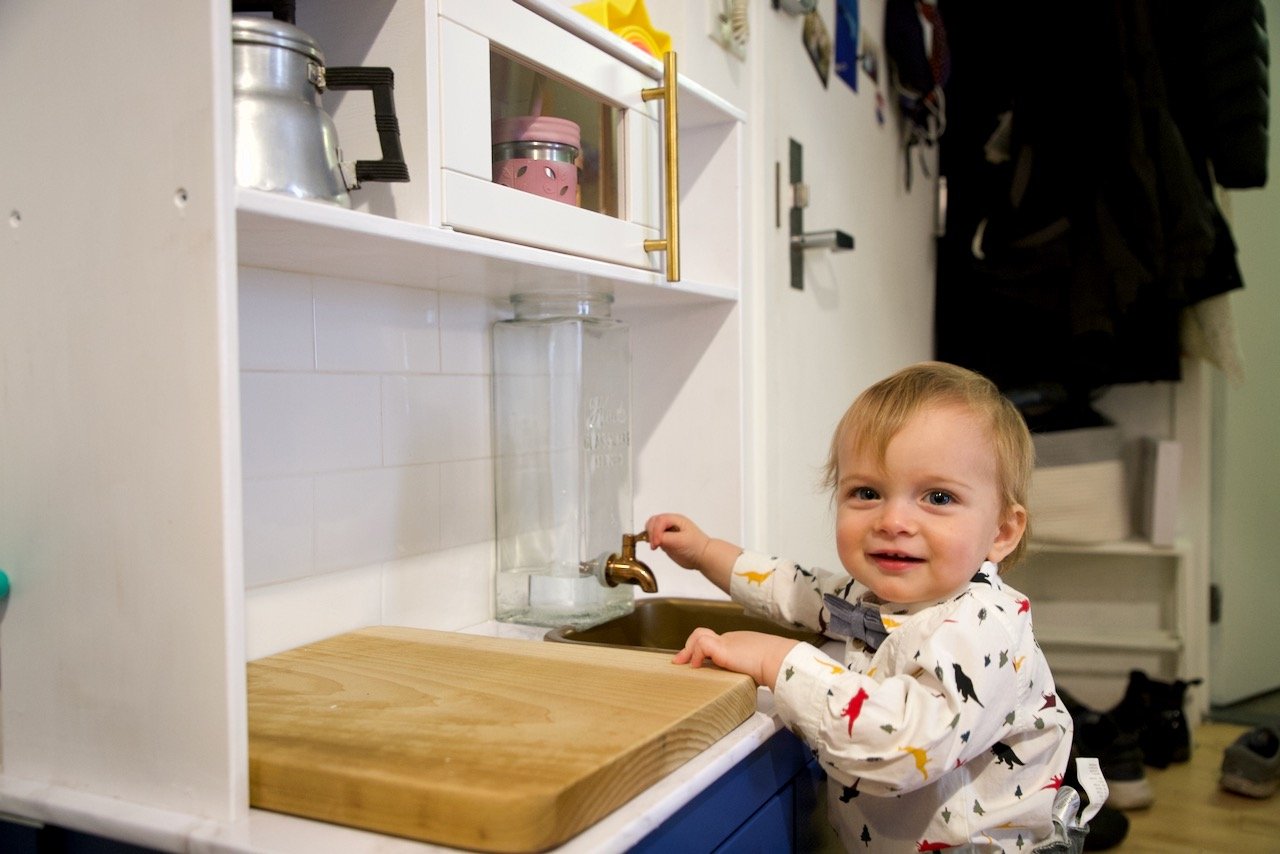
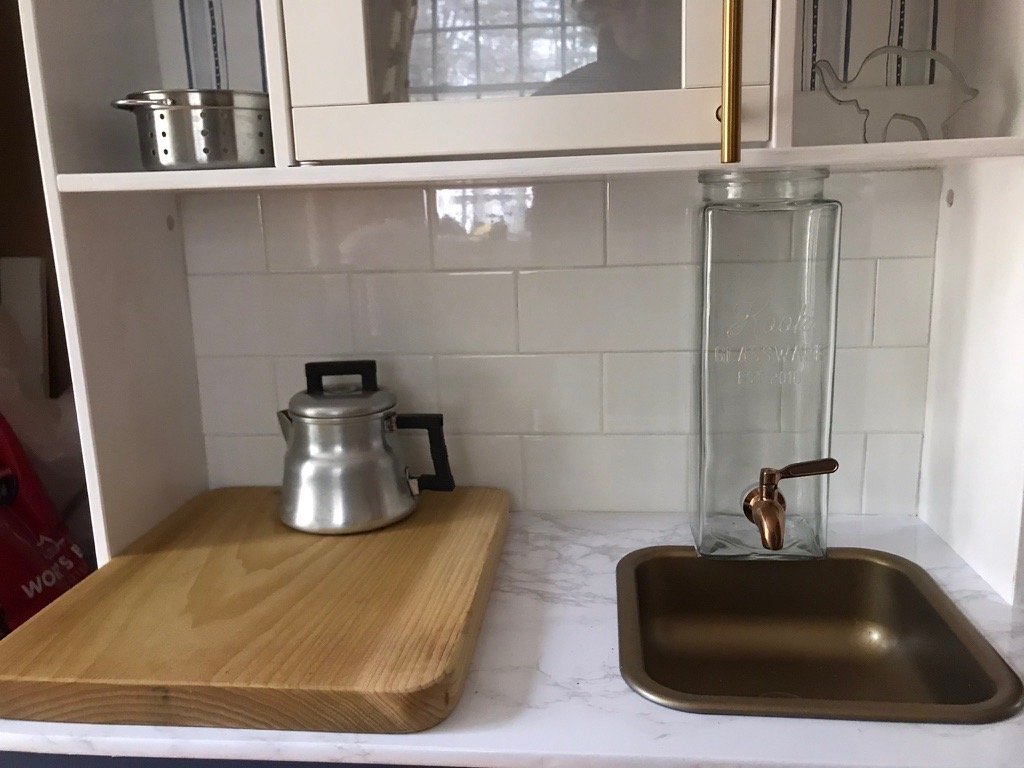
I replaced the battery-operated stovetop that came with the set with a wooden cutting board. The cutting board can be swapped with the IKEA small trofsat bins that are used in their sensory table. I figure this is nice since it can be used either as a cutting board or as a place for fruits and vegetables to dry or a variety of other things since there are two options. Since I had a nice board in our shop I just cut it to size, gave it rounded corners, sanded it smooth, and oiled it with food-safe walnut oil.
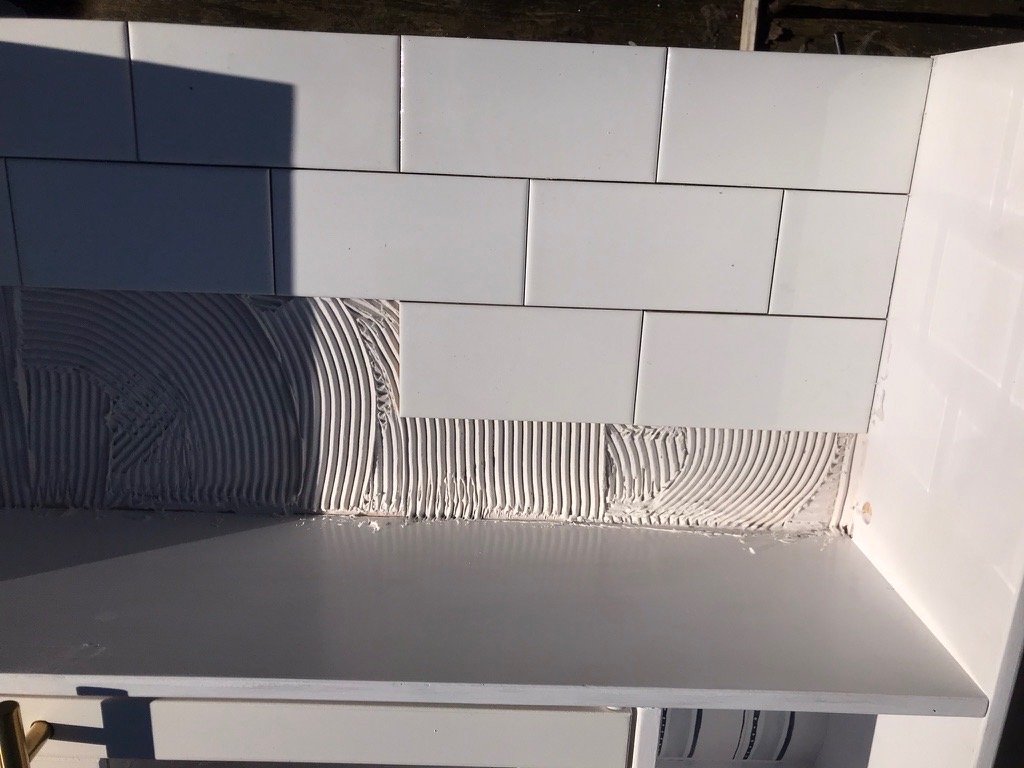
The backsplash was added to the Montessori functional kitchen to match the home kitchen which has white subway tiles. I first added a piece of 1/4 inch plywood cut to overlap the back of the upper section but not extend all the way to the outside edge so it would not be visible from the side. Once the plywood was attached I laid it flat for ease of tiling. This was done before it was connected to the bottom/sink part of the kitchen. Using a tile saw I cut the tiles to fit. I used white thin-set to attach the tiles with a very thin grout line. To match the existing kitchen I used white grout. Alternately, you could do this with peel and stick tiles but because I had left-over tiles and the tile saw it was easy to do it with the real thing.
For a final touch, I applied wallpaper to the back of the cabinet in the lower section and the two little cubby holes on top. This was leftover paper from the nursery walls and I think it helped bring the look together.
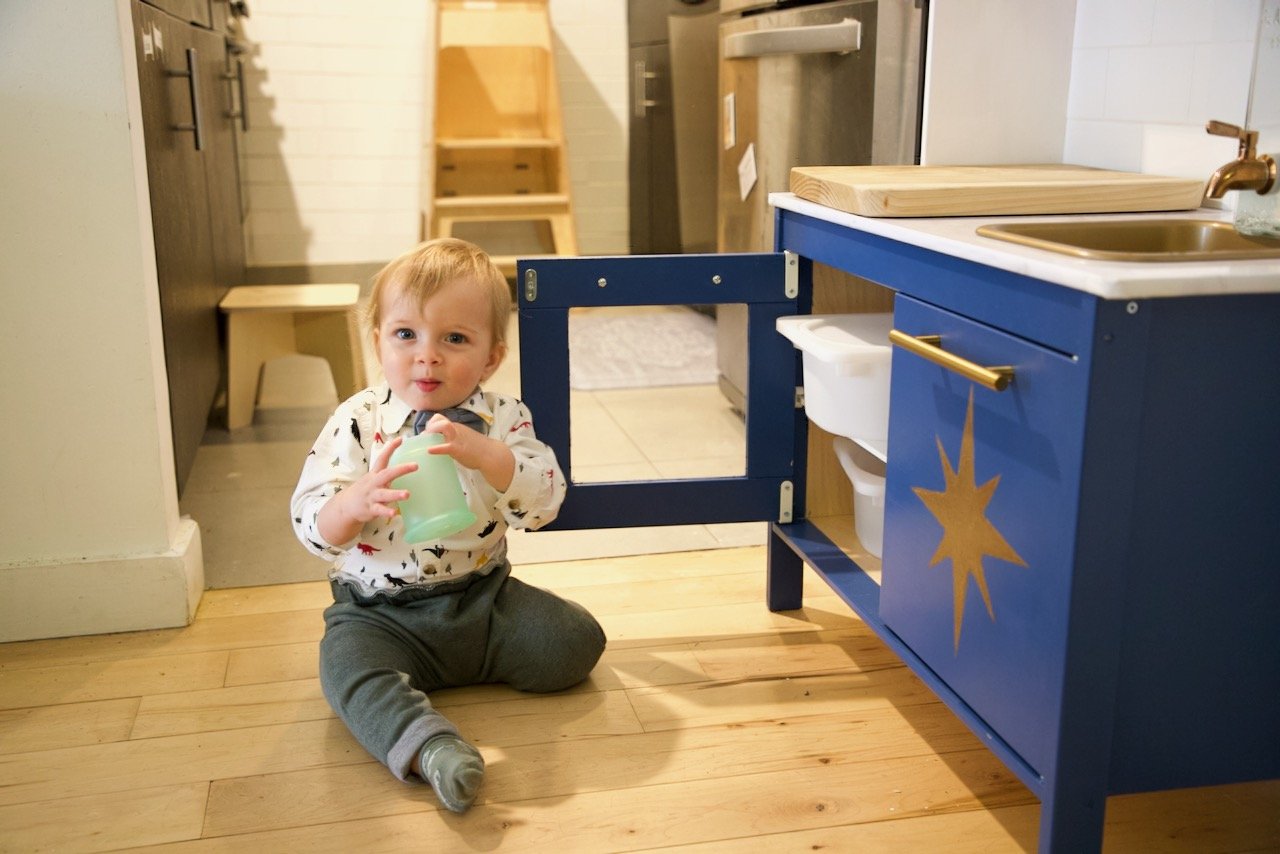
For a functional sink I used a beverage dispenser with a brass spigot. Since I decided to not have the sink drain at this point (I may change this later, but for now it is the best choice for them- for one, it avoids wasting any cabinet space and it also allows Yitzchak to have water collect which is nice for how he washes vegetables and fruits). I wanted them to be able to control the amount of water that can enter the sink so it does not overflow. The beverage container does that as you can control how full it is kept. It was difficult finding a container that fit where I wanted it behind the sink but I did find one on Amazon that worked nicely. The dimensions in the product description were exactly right but when the container arrived it was both taller by 1/2 inch and wider by 3/4 inch. This was discouraging at first but I found that by eliminating the lid, which was not needed anyway and notching the top back of the plastic sink so that the dispenser could overhang the sink by 1/2 inch I got a perfect fit. This alteration was done with a utility knife and a coping saw. As it turns out, the added trouble also had the added advantage of keeping the water dispenser firmly in place between the notches in the sink.”
Yitzchak loves his Montessori functional kitchen and I cannot wait to share how he uses it!